26 Brown Nail Ideas That Look Expensive for Fall and Winter
Introduction
Brown has quietly become the go-to manicure color once the weather cools. It reads richer than black, softer than burgundy, and it works with almost every cold-weather wardrobe, from camel coats to chunky knits to evening black. The difference between brown that looks flat and brown that looks polished comes down to the finish, the nail shape, a single well-placed accent, and how clean the edges are.
The brown nail ideas below range from sheer, milky washes you can manage at home to glossy, detailed designs worth booking a salon appointment for. You’ll find options for short natural nails and long extensions, quiet everyday looks and holiday-ready sparkle. Each one includes notes on how to recreate it, so you can bring a clear idea to your nail tech or try it yourself.
1. Chocolate Cream Glossy Almonds
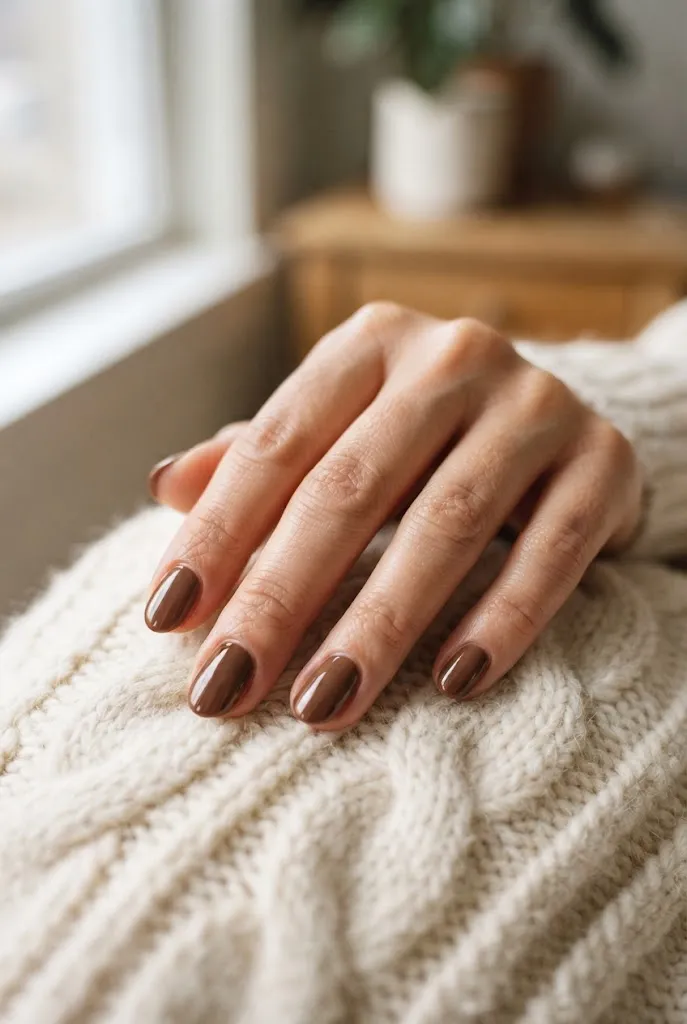
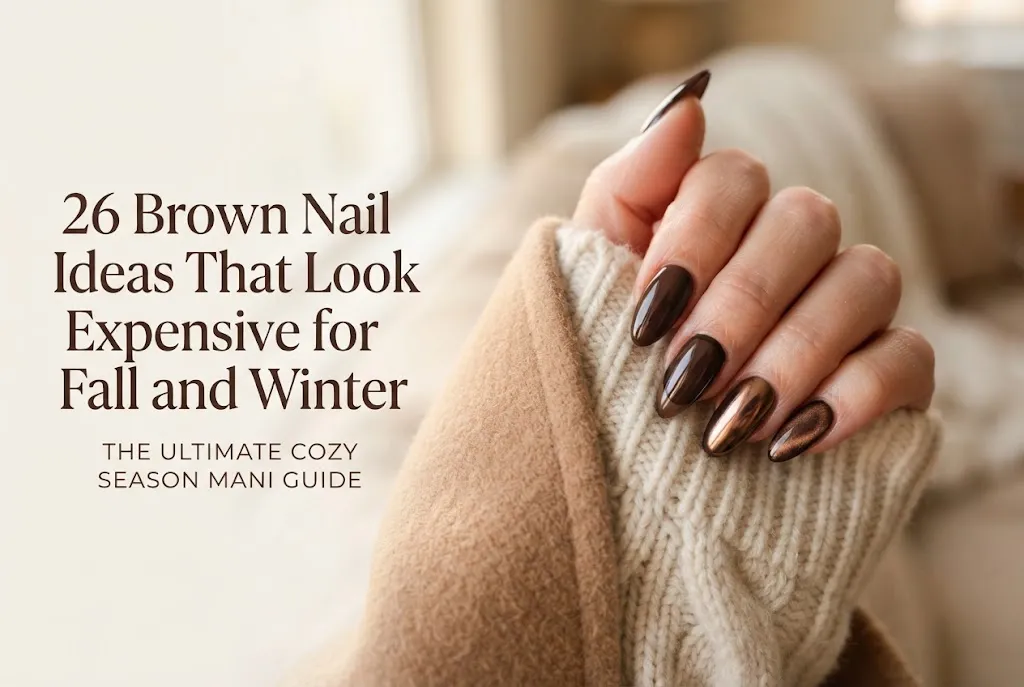
One opaque coat of true chocolate brown, a narrow almond shape, and a glass-like top coat make up the foundation of the whole trend. The tapered shape visually lengthens the fingers, and the deep, even color looks intentional on its own with no art required.
Best For: Everyday wear, work, and first-time brown manicures
Investment: Accessible at home, moderate in a salon
Visual Effect: Solid, high-shine color with a clean silhouette
Choose a brown with a red or warm undertone for fall and a cooler, almost espresso shade for deep winter. Apply two thin coats rather than one thick one, and cap the free edge so the color stays crisp at the tips.
2. Espresso French Tips on a Sheer Nude Base
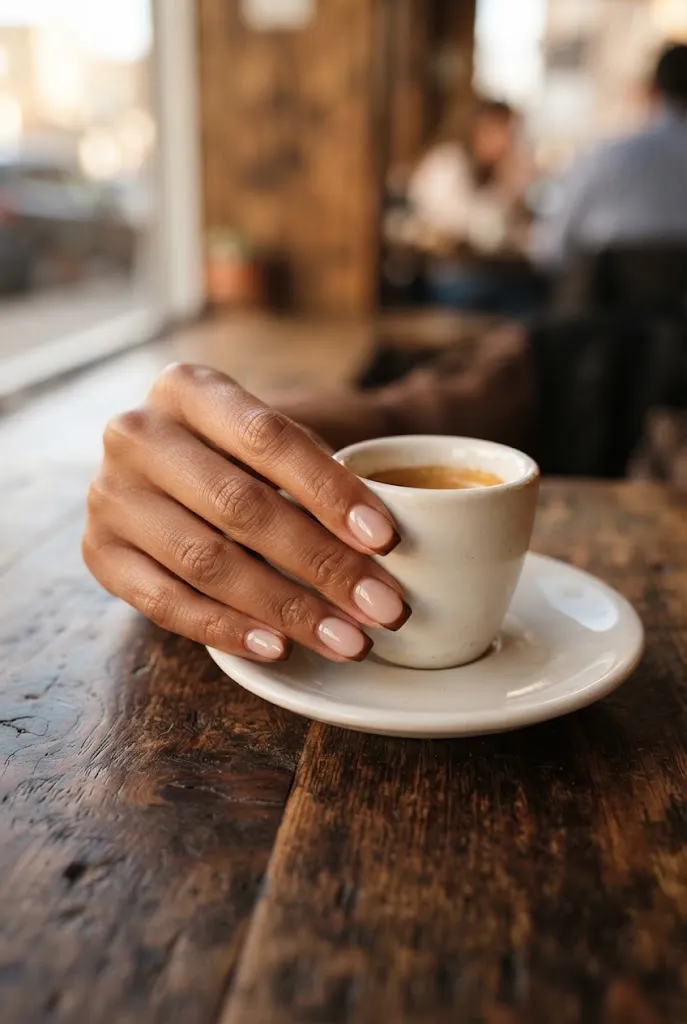
Swap the classic white tip for deep espresso brown and the French manicure suits the cooler months. A sheer pink-beige base keeps the nail bed soft, while the dark tip adds contrast without heaviness.
- Apply a sheer nude or milky pink base and cure or dry it.
- Paint the tip with a thin liner brush or tip guide, following the natural smile line.
- Seal with a glossy top coat, wrapping the free edge.
A slightly curved tip tends to look more modern than a perfectly straight band. If steady lines aren’t your strength, a reusable tip guide helps, but press it down firmly so the color doesn’t creep underneath.
3. Mocha Mousse Milky Sheer Wash
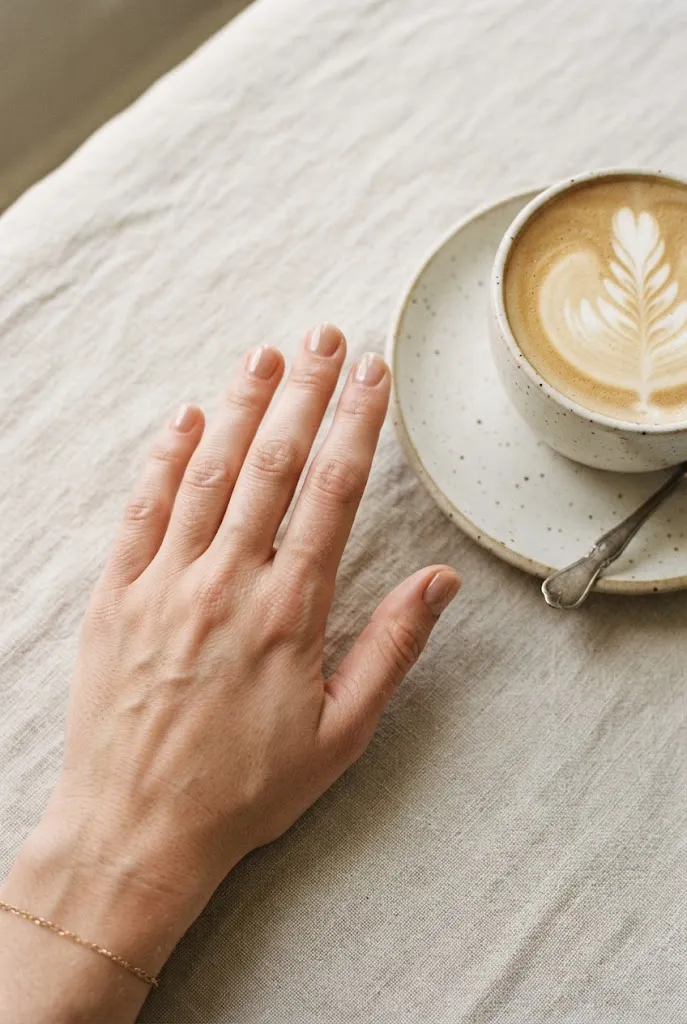
This is the softest way to wear brown: a translucent, latte-toned veil that lets the natural nail show through. It grows out gracefully and suits short nails especially well, which makes it a good fit for low-maintenance manicures.
Build it in two or three thin layers until the color looks even but still slightly see-through. Jelly-style and milky gel formulas tend to give the most even results, while regular polish may need an extra coat.
Quick Tip: Keep the sidewalls and cuticle area clean. Sheer colors show every flaw, so tidy prep matters more here than any extra layer of polish.
4. Brown Velvet Cat-Eye
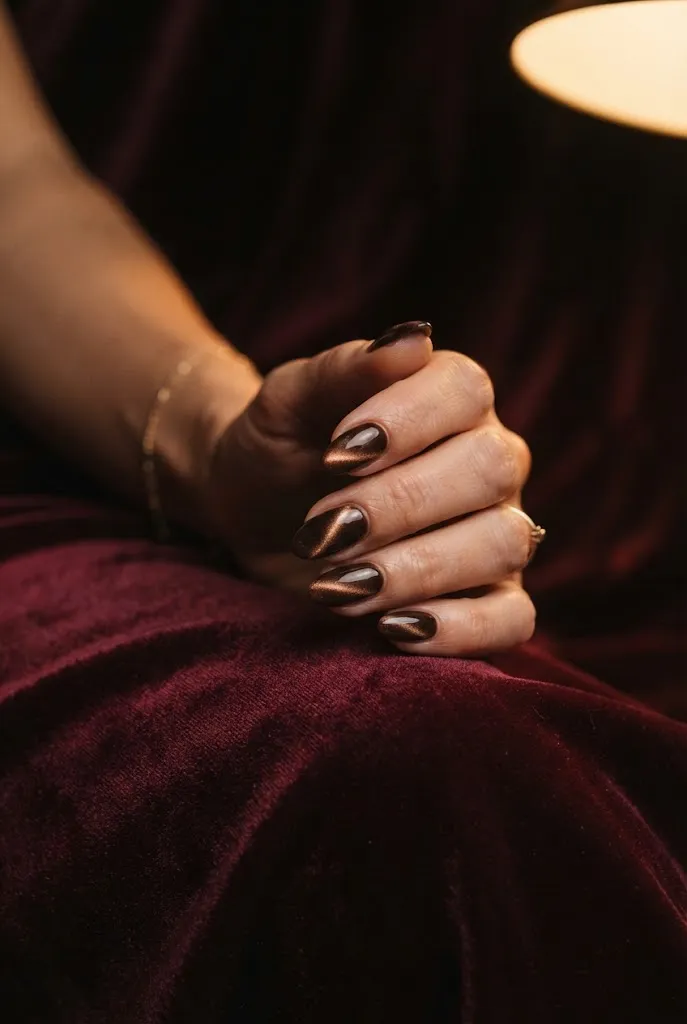
Magnetic gel polish creates a shimmering line that shifts as your hand moves, and in brown the effect looks like polished tiger’s eye. It adds depth without any actual nail art.
- Use a dark brown or copper-brown magnetic gel for the richest shimmer.
- Hold the magnet close and steady while the polish is still wet, then cure.
- Angle the magnetic line diagonally or down the center, depending on the effect you want.
The finish catches lamplight and candlelight, which makes it a strong pick for evening events. It’s also doable at home with a magnetic gel kit and a curing lamp.
5. Tortoiseshell Accent Nails
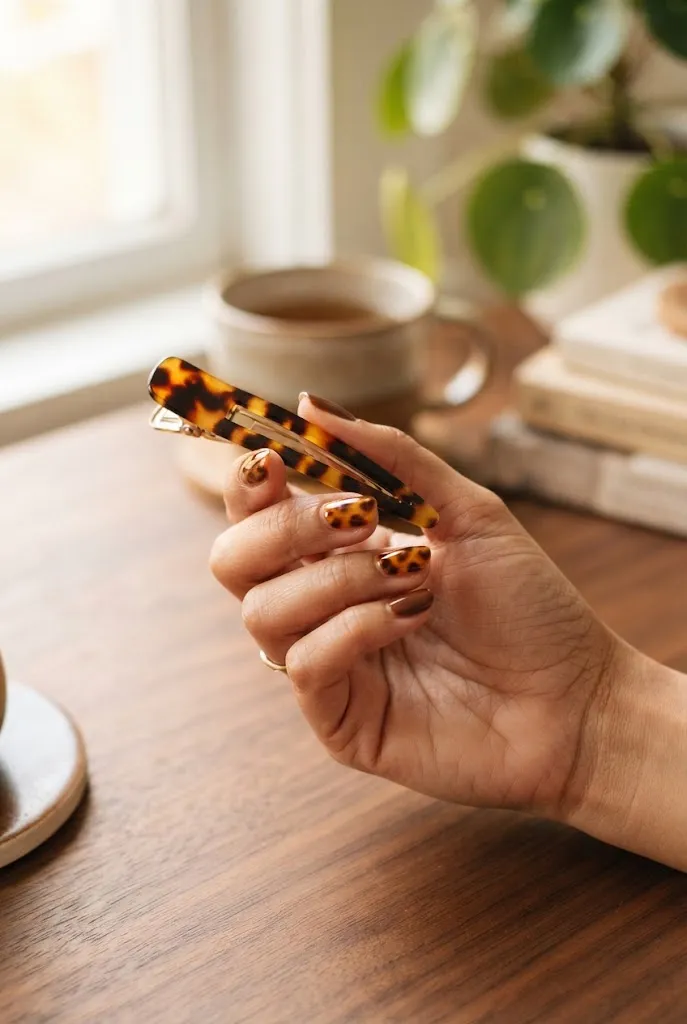
Tortoiseshell borrows the amber, honey, and dark-brown mottling of classic eyewear. Try it on one or two accent nails against a solid chocolate or sheer caramel base.
Layer translucent amber over brown, then dab irregular dark-brown spots with a small brush or sponge. Soften the transitions with a clean brush so the shapes look organic.
Common Mistake: Painting evenly spaced round dots, which looks like a polka-dot print.
Better Approach: Vary the size and shape of each spot and let some blur into the amber so the pattern looks like natural mottling.
6. Bronze Chrome Rub-In
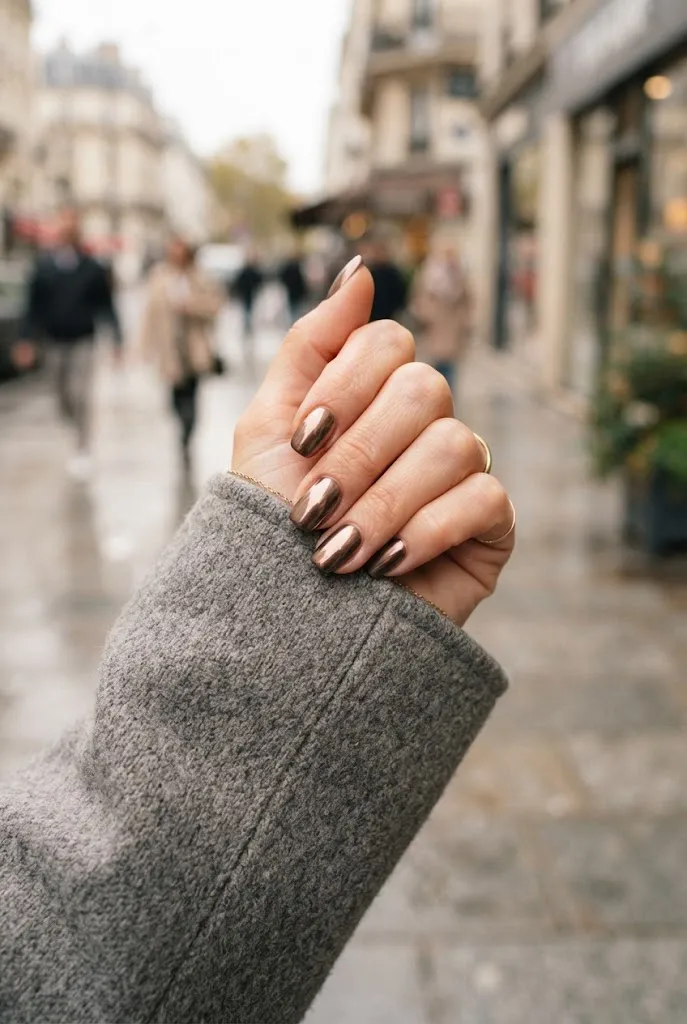
Rub a fine chrome powder over a brown base and the color turns metallic, somewhere between copper and bronze. It’s reflective but still warm, which keeps it from feeling as icy as silver chrome.
Chrome powder works best over a cured no-wipe gel top coat that’s been wiped clean. Use a sponge applicator to rub the powder in, brush off the excess, and seal with another layer of no-wipe top coat.
| Finish | Effect | Best Fit |
|---|---|---|
| Bronze chrome | Mirror-like, metallic warmth | Evening outfits, holiday gatherings |
| Mocha pearl chrome | Softer, milky glow | Daytime and office wear |
7. Brown and Cream Checkerboard Accent
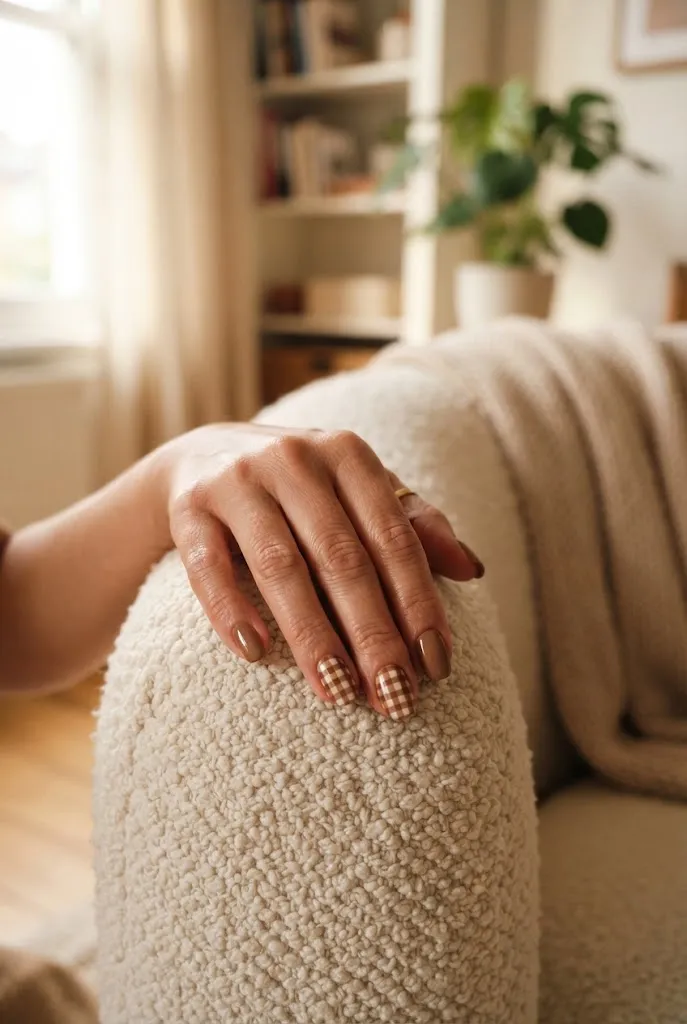
A checkerboard accent on one or two nails brings a graphic, retro feel to an otherwise calm brown manicure. Keep the rest of the nails in solid chocolate or latte so the pattern is the single focal point.
Paint a cream base first and let it dry fully. Then add the brown squares with a fine brush or striping tool, working in a grid of three rows by three columns on short nails and four by four on longer ones. Clean up any wobbles with a small brush dipped in cleanser.
Quick Tip: Mark the grid lightly with a thin dotting tool before filling in the squares to keep the spacing even.
8. Cocoa Ombré Fade
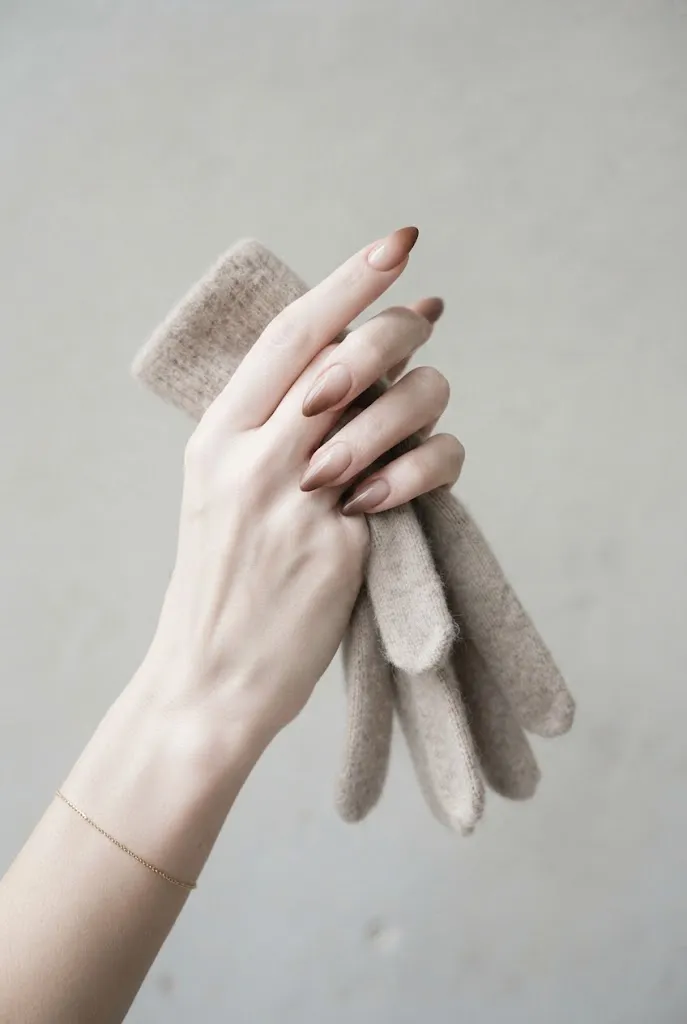
A gradient from deep cocoa at the tips to a soft, milky nude near the cuticle gives nails a subtly shaded, dimensional look. When done in a more neutral palette it’s often called a “baby boomer” nail, and brown makes it feel seasonal.
Sponge application is the easiest approach: dab brown and nude shades onto a makeup sponge side by side, then press onto the nail, building the blend in thin layers. Seal with a smooth top coat, which also hides any sponge texture.
The gradient grows out less noticeably than a solid color, which helps if you like to stretch time between appointments.
9. Cinnamon Brown Matte Short Squares
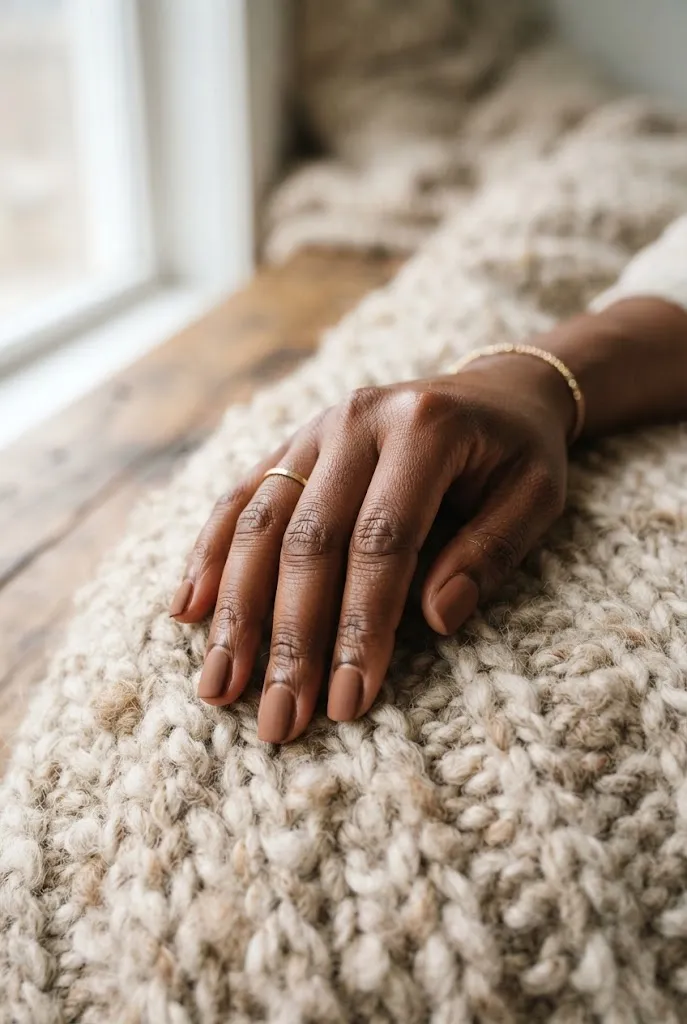
A matte top coat turns brown into something closer to suede. Cinnamon shades with a hint of red look especially rich with a flat finish, and short square nails keep the look neat and practical for everyday tasks.
Do: Use a dedicated matte top coat over a fully cured or dry color layer.
Don’t: Skip cuticle cleanup, since matte finishes make uneven edges easier to notice.
Matte surfaces can show oils and smudges more readily. A quick wipe with a lint-free cloth, and cuticle oil applied around rather than on the nail, keeps the finish even.
10. Subtle Leopard Print Accent
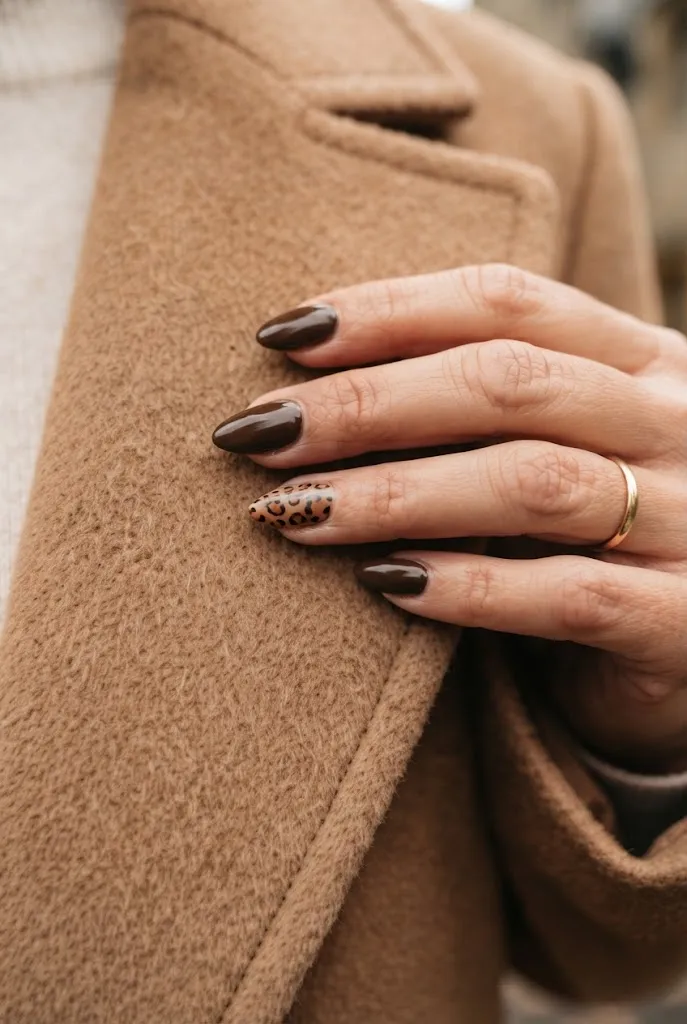
Leopard works in brown because the palette is already there: tan, chocolate, and near-black. Keep the print tone-on-tone for a more refined result, using a caramel base with brown rosettes rather than high-contrast black spots.
Use a thin brush to paint irregular, open-ended crescent shapes rather than closed circles, then add a few smaller dots around them. Limit the print to an accent nail or two and keep the others in solid brown or sheer nude.
11. Gold Foil Flakes on Dark Chocolate
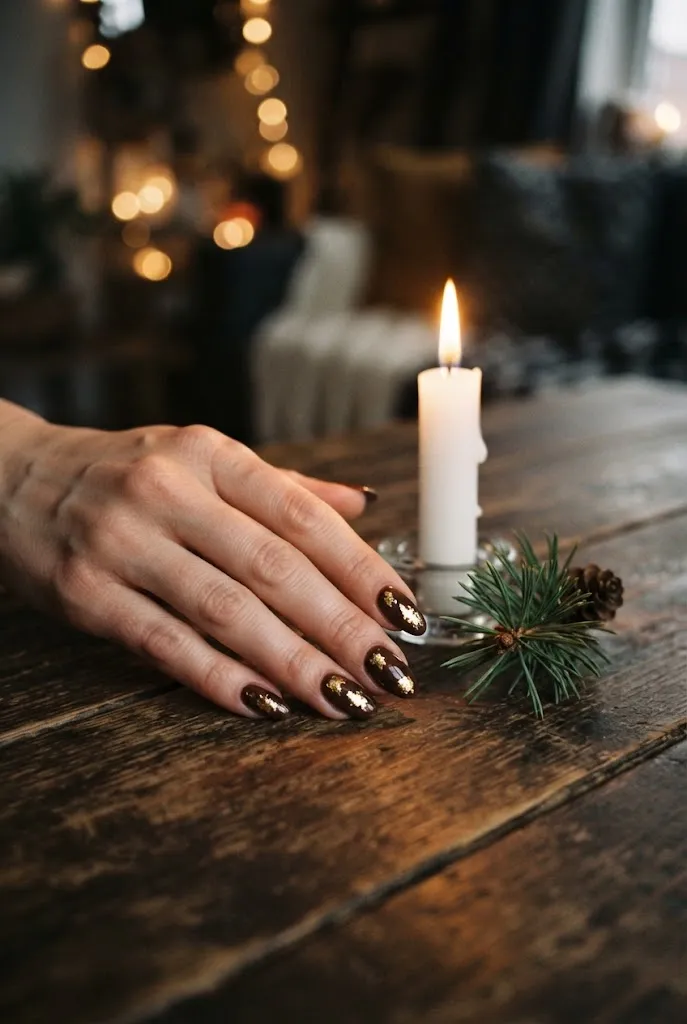
Flecks of gold foil scattered over a deep brown base bring a quiet sparkle suited to the holiday season. The foil catches light unevenly, so the result looks like a dusting of metallic leaf rather than uniform glitter.
- Apply and cure a dark chocolate base.
- Press small pieces of gold foil into a layer of tacky no-wipe top coat with tweezers or a silicone tool.
- Cure, then add a final top coat to smooth the surface.
Keep the flakes concentrated near one side or the tips, since scattering them evenly across every nail can look busy.
12. Latte Marble Swirl
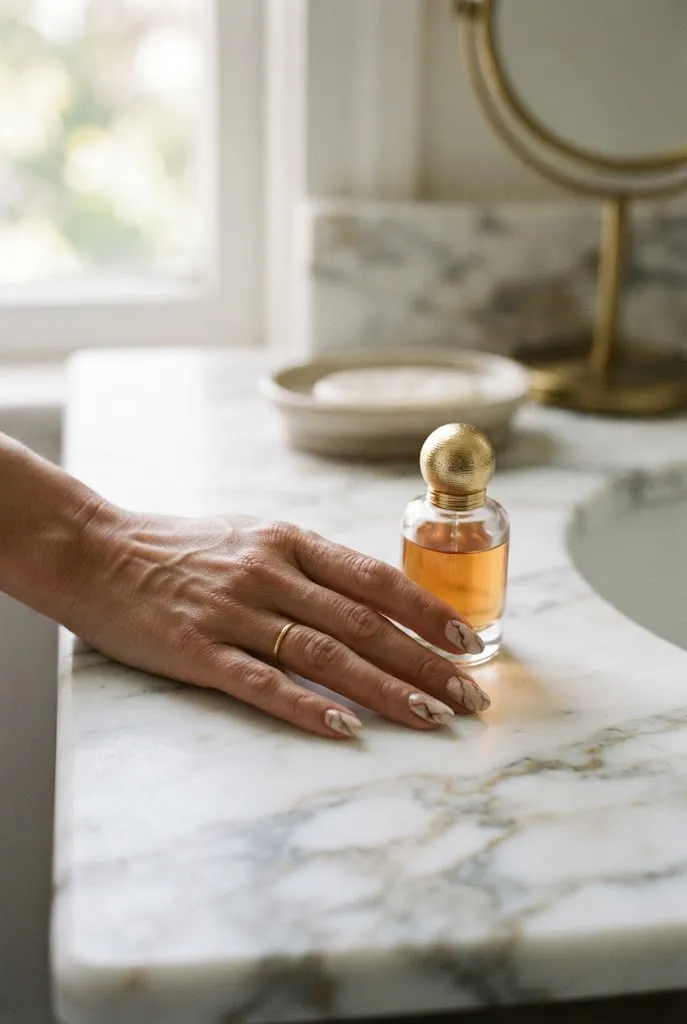
Marble nails use thin, veined swirls of brown through a milky or cream base. The effect is more organic than a stripe or dot pattern, and the soft color transitions resemble natural stone.
Apply a cream or pale latte base, then drag a thin line of brown polish across it with a fine brush. Soften and twist the lines with a clean brush or a piece of plastic wrap pressed lightly onto the wet polish.
Editor’s Note: Marble works best when each nail is slightly different. Matching the pattern identically across all ten nails makes it look printed on rather than painted.
13. Micro French Tips on Short Natural Nails

A micro French is a very thin tip line, usually just a millimeter or two, drawn along the free edge. In brown, it adds definition to short natural nails without the weight of a full tip.
A sheer beige or pale pink base keeps everything looking natural, and the thin brown line gives a finished feel without competing with jewelry or outfits.
- Use a long, thin striping brush for control.
- Start from the center of the nail and draw outward in one smooth stroke.
- Keep the line consistent across all ten nails, since small variations are more noticeable when the line is fine.
14. Rust-Brown Nails With Hand-Painted Leaf Veins

For early fall, a burnt-sienna or rust-brown base with fine, branching lines evokes autumn leaves without painting full leaf shapes. The linework is simple enough to learn with a thin brush and a steady hand.
Paint a short central line from the cuticle or tip, then add small diagonal branches on either side. Use a darker brown or a gold for contrast, and space the branches irregularly so they look like natural veins.
Best For: September through November
Visual Effect: Warm, earthy color with fine detail
15. Brown Tartan Plaid
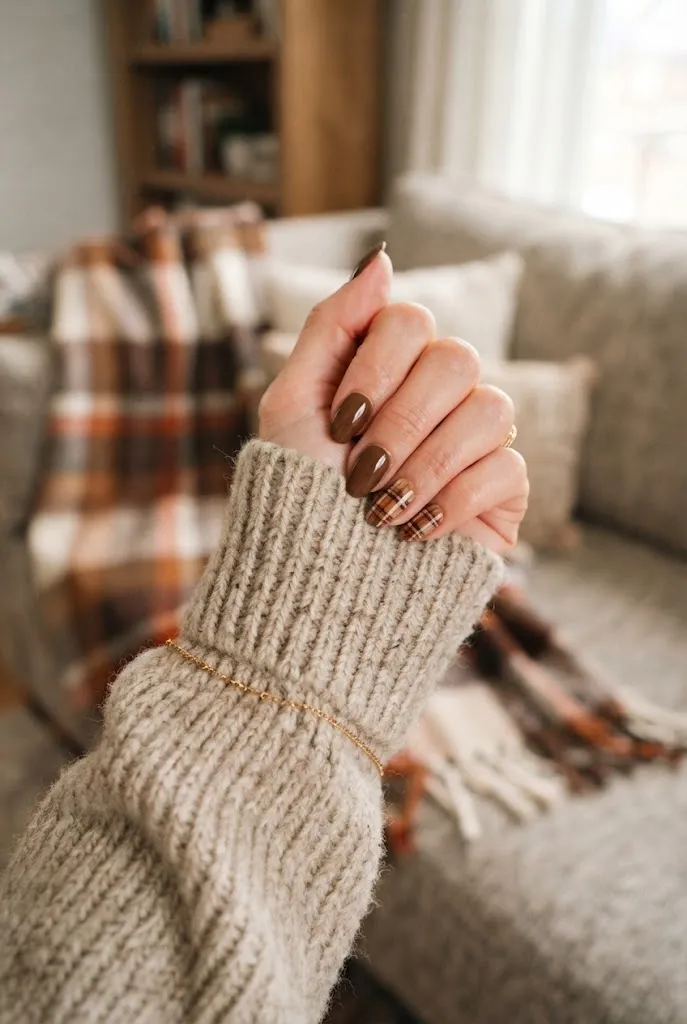
Plaid nails echo winter sweaters, scarves, and flannel. A brown tartan in layers of chocolate, caramel, and cream feels warmer and more muted than the bright red-and-green versions.
Start with a solid base, then paint thin horizontal and vertical bands in a lighter shade, and finally overlay slightly thinner lines in a darker or contrasting color. Because the pattern is detailed, it’s usually more manageable on one or two accent nails than on all ten.
Tips & Tricks
- Use a nail striper brush for long, even lines.
- Let each layer dry or cure before adding the next to prevent smearing.
- Pair with solid brown on the other fingers to keep the look balanced.
16. Rhinestone Ring Finger on Long Coffin Brown
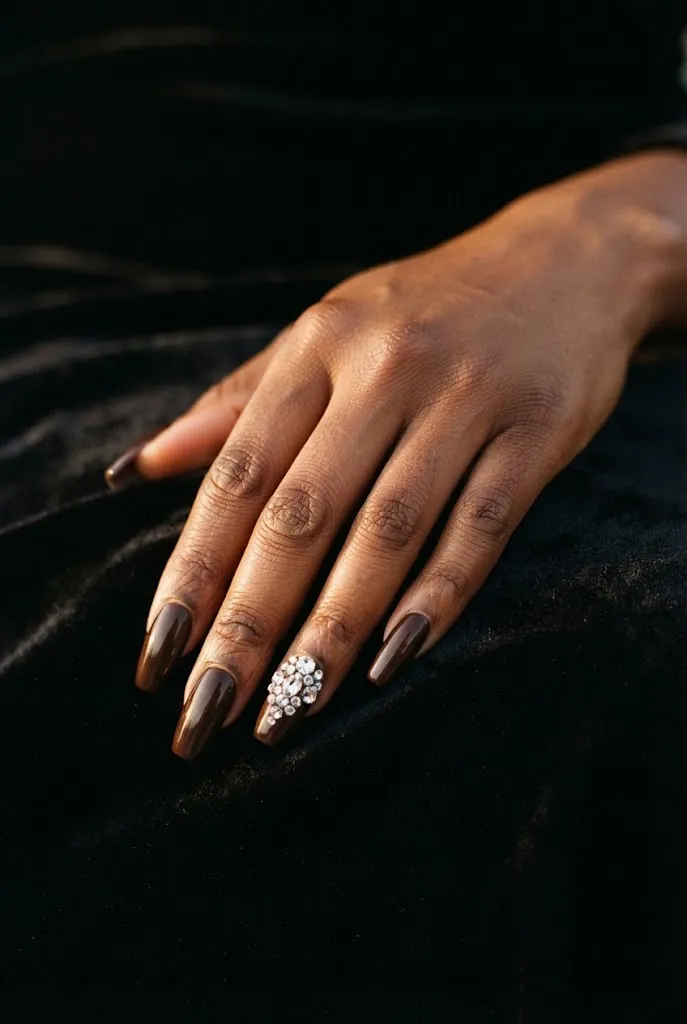
Long coffin nails in dark chocolate suit anyone who wants drama, and a small cluster of rhinestones on the ring finger gives the look a jewelry-like accent.
Keep the crystals clear or champagne-toned rather than colorful, which stays consistent with the brown palette. Place them in a gentle curve or a small cluster near the cuticle, away from the tip where they’re more likely to catch on fabric or hair.
Common Mistake: Adding gems to every nail, which can read as heavy.
Better Approach: Limit the crystals to one or two fingers and secure them with gel or a strong nail-gem glue for durability.
17. Brown Aura Blush
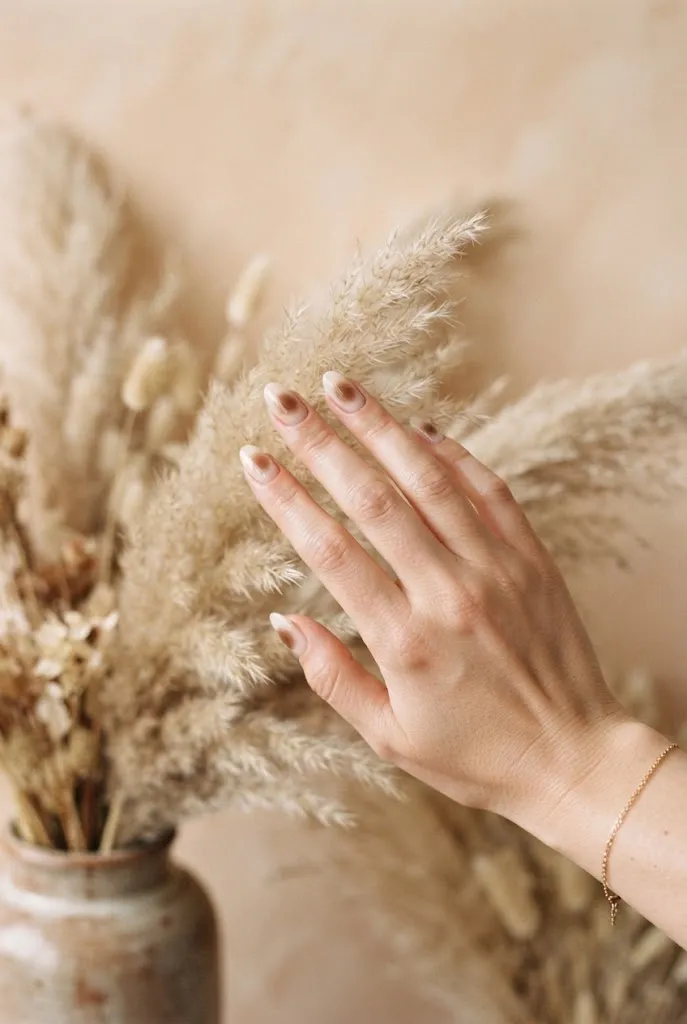
Aura nails use a soft, airbrushed-looking cloud of color in the center fading out toward the edges. In brown, the effect is warm and diffused, a little like a sunset through a window.
Sponge a mid-brown into the center of a milky or pale beige base, then blend a lighter brown around it. A cloudlike gradient, rather than a defined circle, gives the look its soft quality.
Best For: Anyone who wants something more artistic than a solid color but still gentle and wearable.
18. Matte and Gloss Stripe Geometry
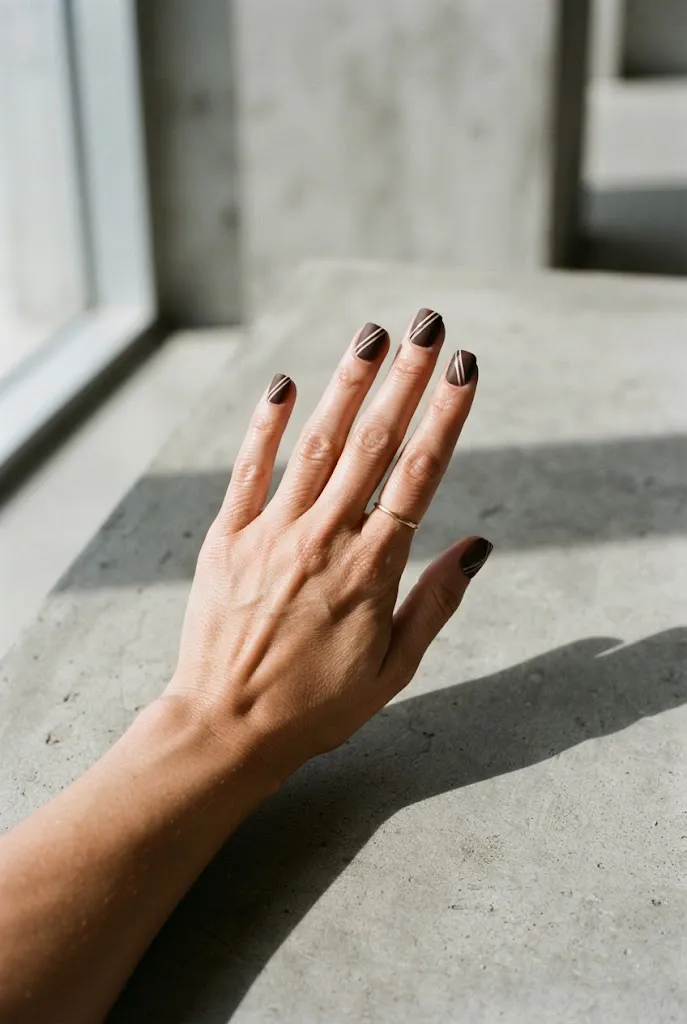
Using both finishes on one nail adds texture without adding color. Paint the nail in a single brown shade, apply matte top coat across the whole surface, then add narrow stripes or a single diagonal band with glossy top coat.
The look relies on light. In daylight the glossy lines catch highlights while the matte areas stay velvety, which makes for a subtle contrast that’s easy to miss at first glance and rewarding up close.
| Option | Effect | Best Fit |
|---|---|---|
| Glossy stripe on matte | Subtle, tonal contrast | Minimalist outfits, office |
| Matte stripe on glossy | Bolder, more graphic | Evening, statement nails |
19. Negative Space Brown Lines
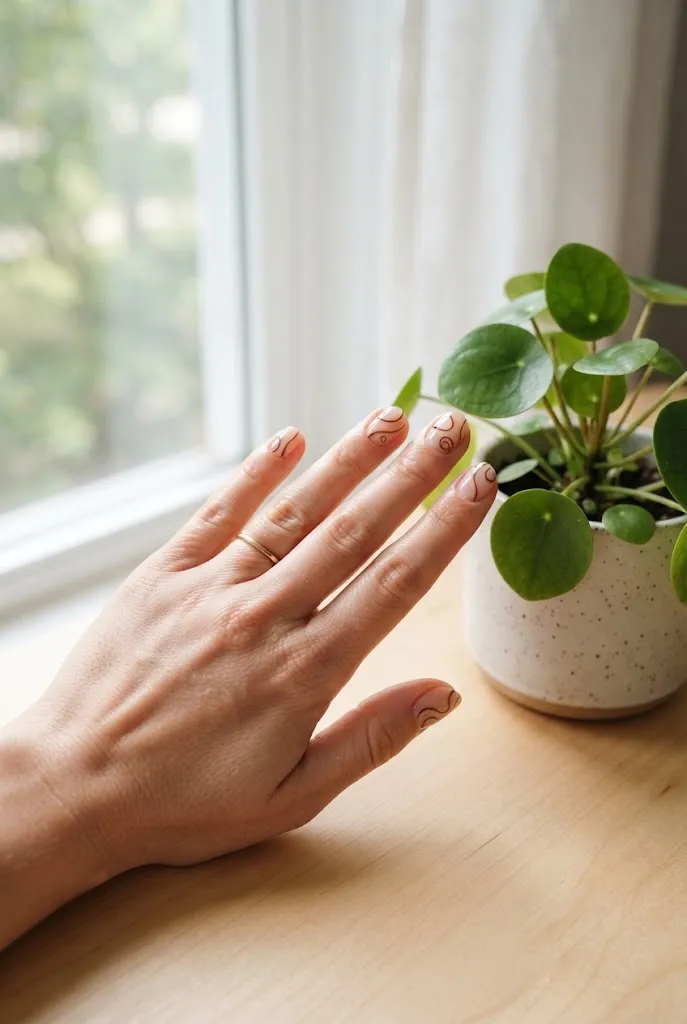
Negative space designs leave parts of the natural nail visible between brown shapes. A single curved line, a half-moon at the base, or a diagonal slash in brown against a clear base gives a graphic look that suits minimalists.
Because the bare nail is part of the design, prep matters more here. Buff gently for evenness and use a sheer clear or milky base to unify the surface.
Quick Tip: Slightly asymmetrical placement looks more modern than perfect symmetry, so don’t worry about matching every line exactly across both hands.
20. Mushroom Taupe Quiet-Luxury Ovals
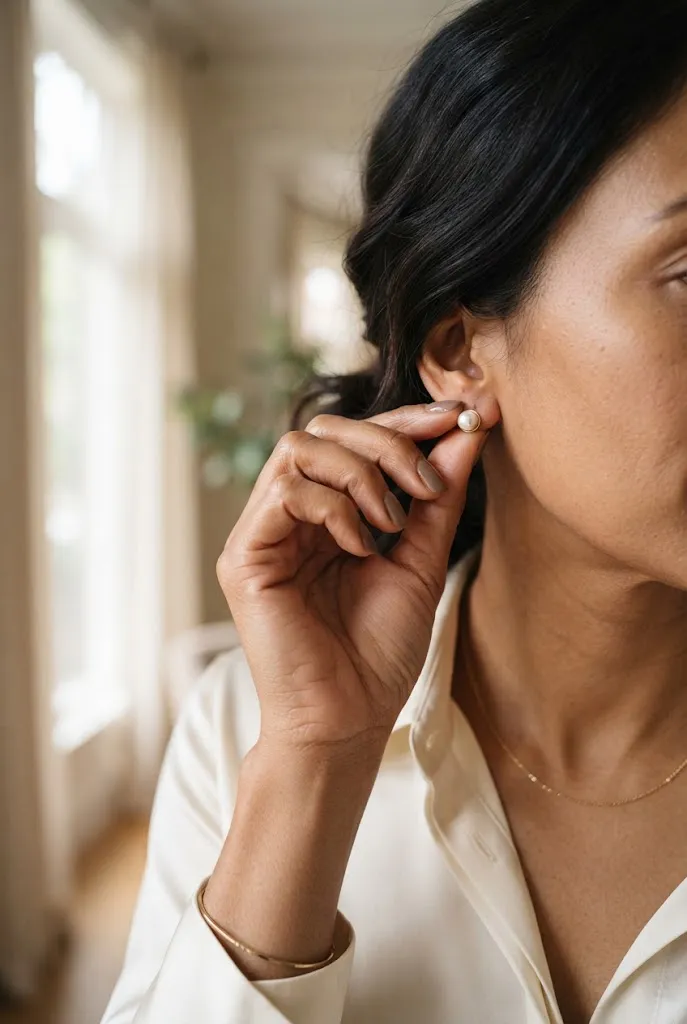
Taupe is brown’s grayer, more subdued cousin, and in a short oval shape it creates a manicure that blends with almost everything. It fits the muted neutrals that fill many winter wardrobes.
Choose a mushroom or greige shade with enough depth to show on the nail, not so pale that it disappears. Two coats with a high-gloss top coat give it a clean, finished look.
- Pairs well with ivory, charcoal, and cream.
- Works with silver and gold jewelry.
- Suits short natural nails and moderate lengths.
21. Mocha Pearl Shimmer
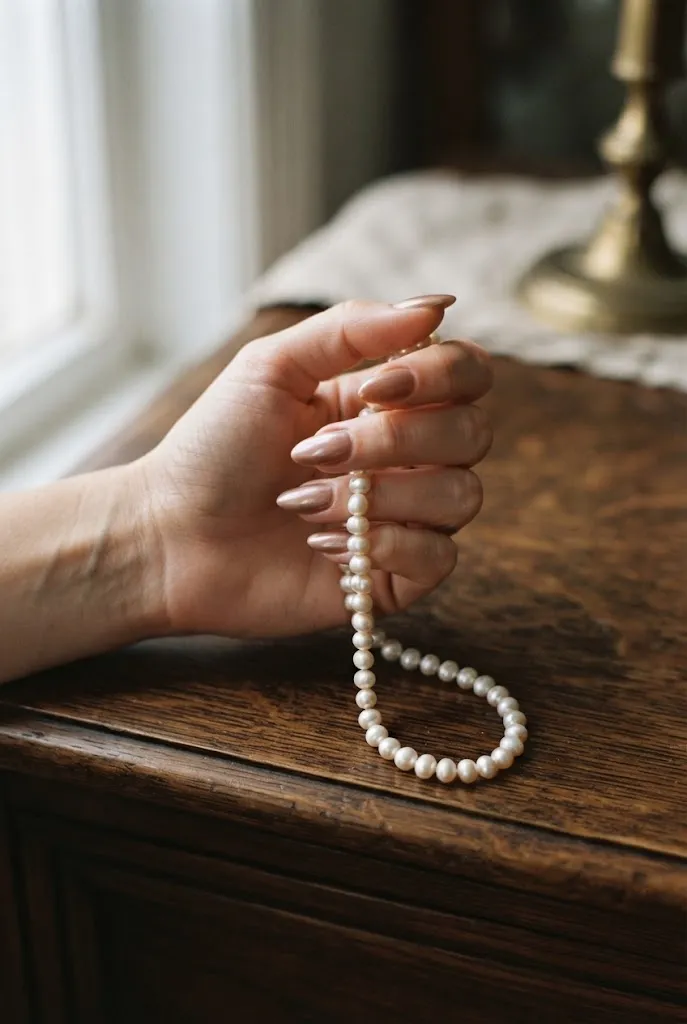
Pearlescent pigments give brown a soft glow, a little like light on the inside of a shell. Unlike chrome, which reflects sharply, pearl diffuses light, so the nail seems to glow rather than flash.
Rub a fine pearl powder over a tacky layer of gel, or choose a pre-made pearlescent polish in latte or cocoa. A sheer base lets the shimmer show more clearly, while a deeper base mutes it.
22. Tiny Snowflakes on Brown
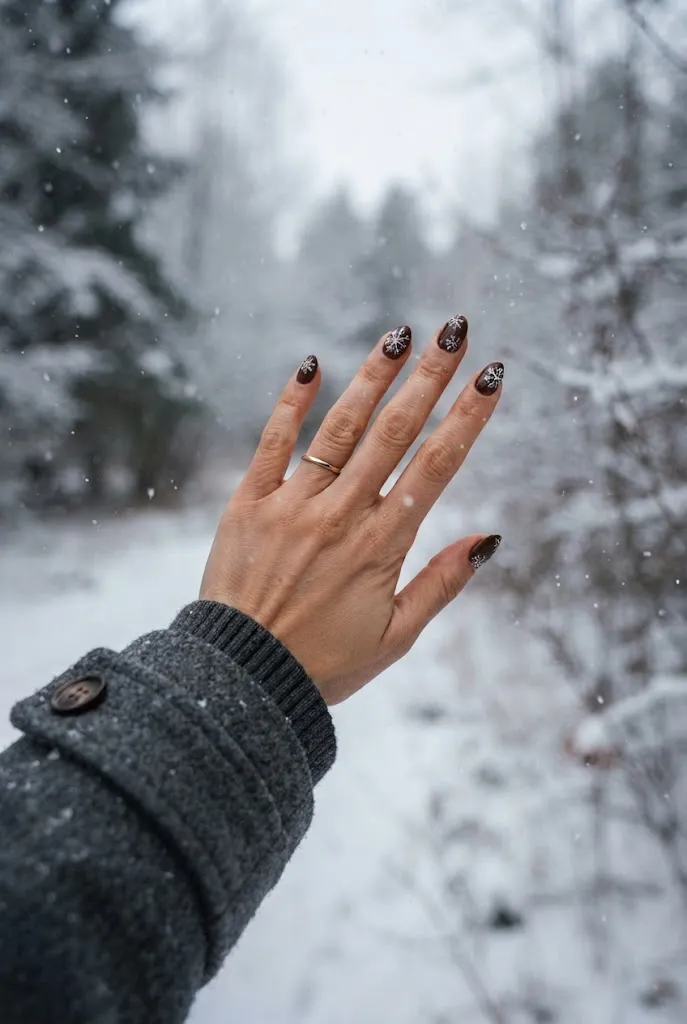
Delicate white snowflakes on a rich brown ground make a winter manicure that doesn’t depend on bright color. Keep them small and sparse, one or two per nail, so the base color stays the focus.
Use a fine liner brush to paint a short cross, add two shorter strokes across each arm, and finish with a dot at the center. They don’t need to be identical, since hand-painted irregularity gives them charm.
Best For: December and January, or anywhere winter calls for something lightly festive.
23. Hand-Painted Ribbon Bows

Tiny painted bows have become a sweet counterpoint to serious neutrals. On mocha or chocolate, a bow in cream or soft pink reads as delicate rather than juvenile.
- Paint two small teardrop shapes pointing toward each other.
- Add a small dot or oval at the center for the knot.
- Draw two short tails beneath and let everything dry before top coat.
Place the bow near the base or center of an accent nail with plenty of empty space around it. A single bow is often more elegant than several.
24. Wavy Gold Line Art on Brown
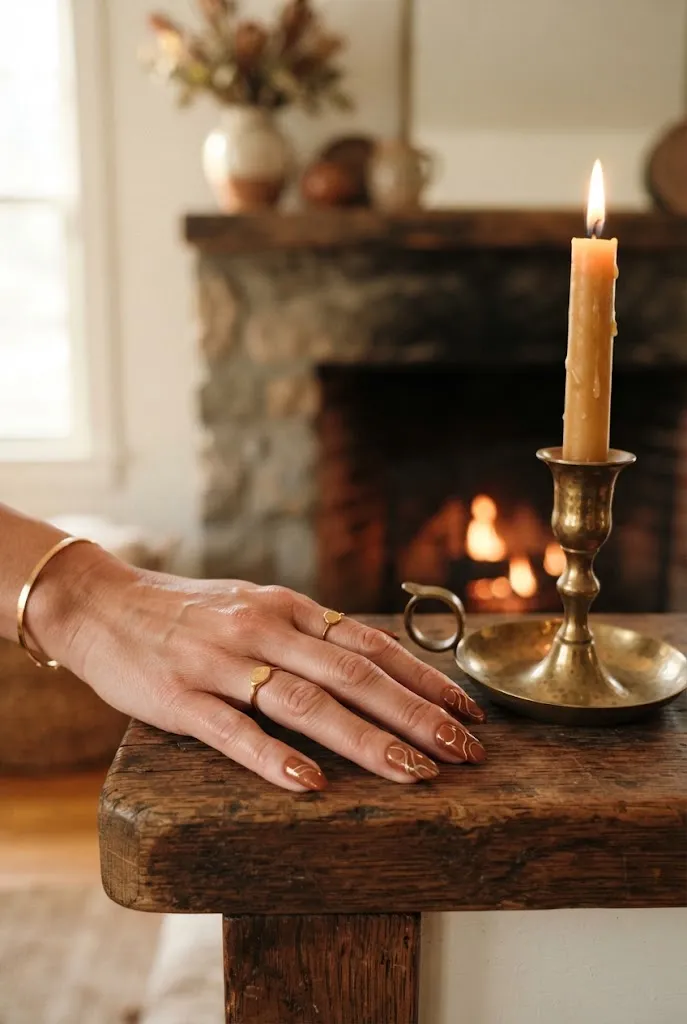
Thin gold squiggles across a brown base bring jewelry-like detail without gems or glitter. Wavy lines feel looser and more modern than straight stripes.
Use a metallic gel liner or gold polish with a long striper brush, drawing from the cuticle area outward in one flowing motion. Let one or two lines drift off the edge of the nail rather than staying neatly contained.
Editor’s Note: Gold looks warmer against brown than silver. If you wear mostly silver jewelry, consider a pale champagne instead of yellow gold.
25. Smoky Mocha Glitter Fade

For parties, a gradient of champagne glitter rising from the tips of a mocha base adds sparkle that’s concentrated rather than all-over. It sits comfortably between subtle and festive.
Apply the brown base, then sponge a fine glitter polish from the tip toward the middle, building density at the edge. Seal with a smooth top coat so the glitter doesn’t feel rough.
Tips & Tricks
- Fine glitters blend more smoothly than chunky ones.
- Remove with the foil-wrap method to avoid scraping the nail surface.
- Choose champagne or gold glitter to stay in the warm palette.
26. Cherry Cola Brown
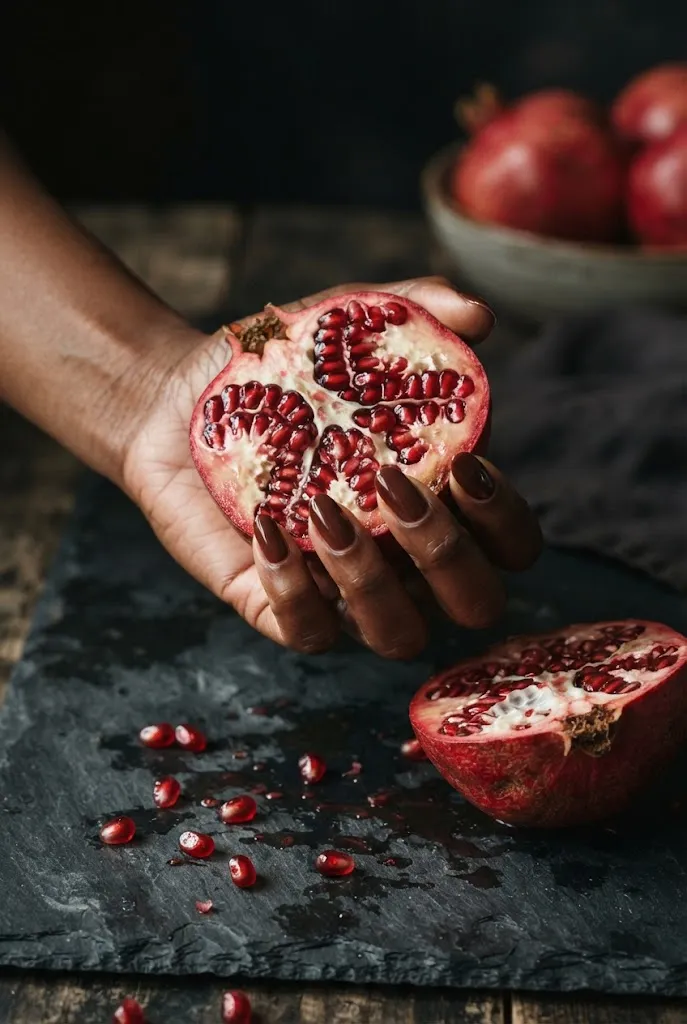
Brown with a deep red undertone sits between chocolate and burgundy. It’s rich enough for winter and warm enough to flatter many skin tones without leaning too dark or too orange.
Try it in a creamy finish on short or medium oval nails. It pairs well with black, cream, and olive outfits, and a glossy top coat keeps the color looking saturated.
How to Choose Your Brown
Picking a shade is easier when you consider your skin tone and what you wear most.
| Shade Family | What It Looks Like | Works Well With |
|---|---|---|
| Warm chocolate and cinnamon | Reddish, earthy | Camel, cream, olive, rust |
| Cool espresso and taupe | Deep, slightly gray | Black, charcoal, ivory, silver |
| Sheer latte and mocha | Soft, milky | Nearly everything, especially knitwear |
Most people can wear most browns, so trust the swatch on your own hand over any rule. Test a shade on one nail first if you’re unsure, since the same polish can look different against different skin tones and in different light.
Where to Start
If you’re new to brown nails, begin with a solid chocolate or a sheer mocha wash, then add one accent such as a cat-eye finish or a single gold line once you’re comfortable. For a salon visit, bring screenshots of two or three ideas from this list along with your preferred length and shape. If you’re doing your own nails, focus on clean prep and thin coats, since those two habits improve every look here more than extra products.